How to Create L2TP/IPSec VPN Connection in Windows 7
Before you could establish a L2TP/IPSec connection to VPN Server, it is important for you to check if the computer you are dialing does have all the necessary certificates. You may visit my blog Create L2TP/IPSec Certificate for TMG 2010 using Enterprise CA which I mentioned all the steps to import certificates from CA to your computer.
1. Right click on Network Connection at the task bar and select Open Network and Sharing Center

2. Select Connect to a Network. Click Next

3. Select Connect to a Workplace. Click Next

4. Select No, create a new connection. Click Next. (This only if you have other connection)

5. Select Use my Internet connection (VPN)

6. Type in the VPN server IP or FQDN
7. Give the connection a name
8. Check Don't connect now, just set it up so I can connect later. Click Next

9. Type in the credential. Click Finish

10. Right click the connection you have created. Select Properties

11. At the Options tab, uncheck include Windows logon domain

12. At the Security tab:-
- Type of VPN : Layer 2 Tunnelling Protocol with IPSec (L2TP/IPSec)
- Data encryption: Optional encryption (connect even if no encryption)
- only check Microsoft CHAP Version 2 (MS-CHAP v2) (you may have differences setting compare to mine. Refer to you VPN administrator for the correct authentication protocol)
- Click Advanced settings. Check Verify the Name and Usage attributes of the server's certificate

13. At the Networking tab, uncheck Internet Protocol Version 6 (TCP/IPv6)
14.Select Internet Protocol Version 4 (TCP/IPv4). Click Properties

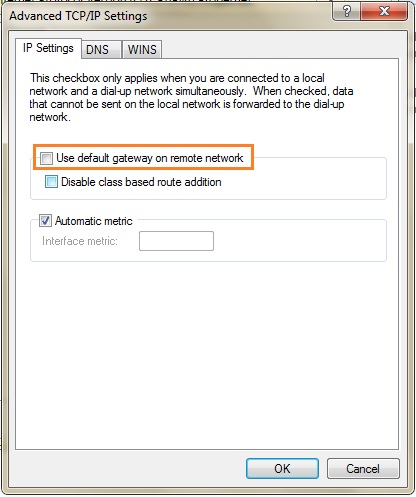
15. Uncheck Use default gateway on remote network. (This will prevent you network traffic being route to the remote gateway)
16. Click OK
17. Click OK to close the connection Properties page
18. Double click the connection you have created. Click Connect

19.Upon connection established, verify the connection Details

20. Also verify the session in TMG 2010
